Welcome to the first installment of my tech tips/shooting skills/professional tricks-of-the-trade section of the DriftwoodFotoBlog!
As I eluded to in the previous post, there are too many tip/skill articles out there claiming pro-level advice, but in reality regurgitating beginner-level skills. If you read those I hope you learn a lot. For myself, I’ve always found them misleading in their titles and frustratingly lacking in their delivery. The articles in this section of my blog are intended to bridge that gap from entry-level skill sets, to more advanced, professional level skills, techniques, or tricks-of-the-trade.

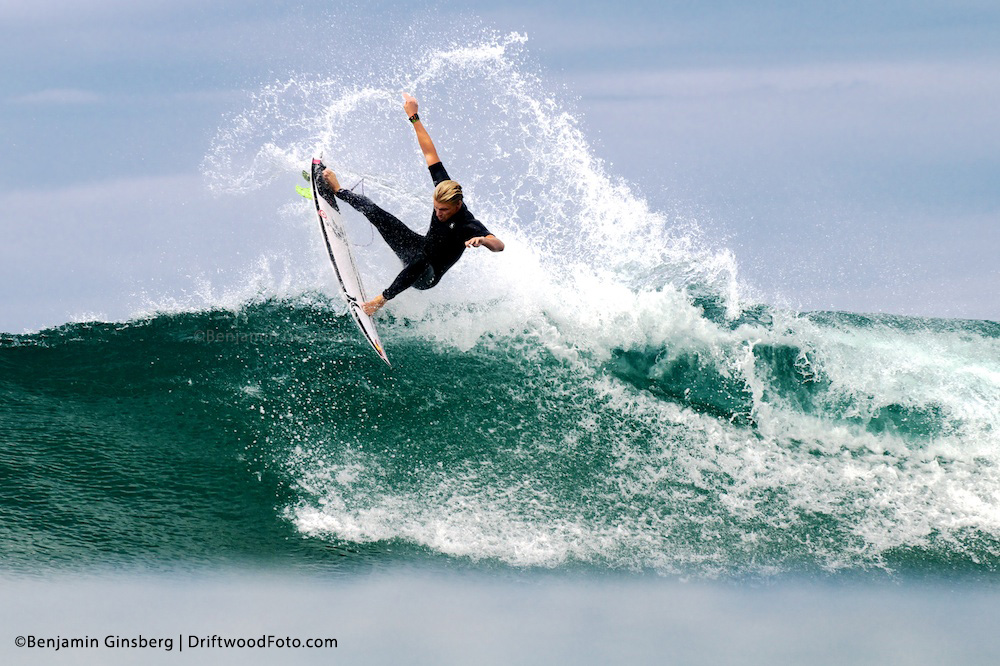
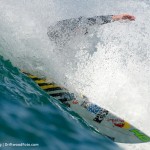
Kolohe Andino at Lower Trestles, shot with a Nikon 70-200mm lens in a geared port, with the reforming wave in the foreground.
Today I’ll be discussing using a longer focal length lens with a dry-port for your surf/water photography. Still with us? Good.
Anyone who’s shot surfing from the water (or who has aspired to do so and done their due diligence), knows the difference between shooting a wet-port with a wide-angel or fisheye lens, versus a dry-port with a longer focal length lens.
With a dry-port, the hardest part (when your first starting out) is to keep that damn thing clear of water. Water drops on the front of the lens port will ruin your shot just as easily as water or dust spots will on land. Only now you’re in the water, and on top of that in the ocean where the water is constantly moving, so it’s infinitely more likely you’ll have to deal with this issue.
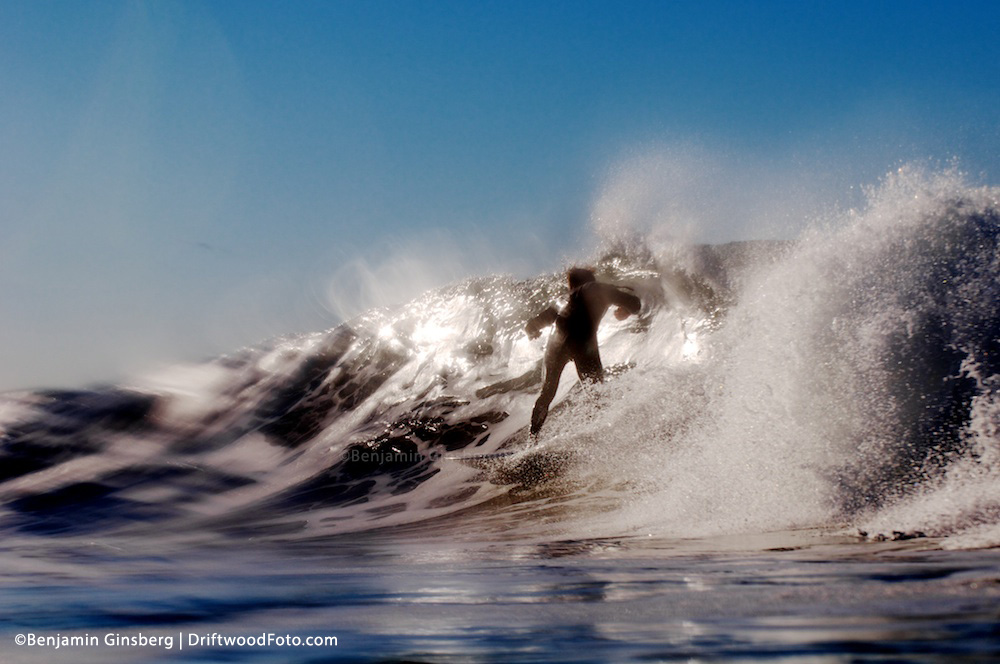
Water sheeting over the lens port-notice the soft focus areas as the water spots and sheeting distorts the subject on what should be a dry-port (this can create an artistic effect if you get lucky, but don’t rely on it).
If you’re swimming in the channel at a reef break, with the camera/waterhousing propped up on a boogie board, it’s not so hard to keep it clean and dry. More often than not I’ve found you’ll be swimming with the camera, diving through waves, and submerging it. Let’s face it, your arm will get way to tired if you to keep the housing above the surface for however many hours you happen to be out swimming, and it’s just not feasible to keep it dry an entire session. Accept the fact the whole thing is going under multiple times while your out taking photos.
Distracting spots detract from overall image quality.
In shooting water for the past 4 years, I’ve found people who on pain of death will not divulge their technique, and others who jump at the opportunity to share their knowledge. The good news is, it’s actually not a big secret.
Techniques out there you might hear include:
- Waxing/buffing your lensport with car wax;
- Sunscreen;
- Cooking oil;
- Some mixture of all of the above in varying proportions.
These certainly do work, but for a very limited time. Maybe 10-15 minutes in the water at best.
¡! Note: DO NOT use Rain-X; intuitively it might seem a great idea as it works phenomenally well for your car windshield, but it will erode small pits/divots into the polymer surface of your lens port, even if you cannot see them with the naked eye.
So how do you prolong the effectiveness of these techniques?
- Recommendations range from: you don’t, to extra sunscreen, using grease from your nose, forehead, behind your ear, or wherever you’ve got some. (Appealing, I know!);
- Another trick I found is to treat the end of your lens port like a pair of skis or a snowboard: apply your wax, sunscreen, oil, or custom combination thereof to the lensport and leave it on between sessions (overnight, a day, a week, however long it happens to be between sessions), then buff the wax/oil/mixture off before heading out in the water with a microfiber cloth.
Unfortunately this still has a very limited duration of effectiveness. It might grant you an additional 5-10 minutes of clear, spot free shooting.

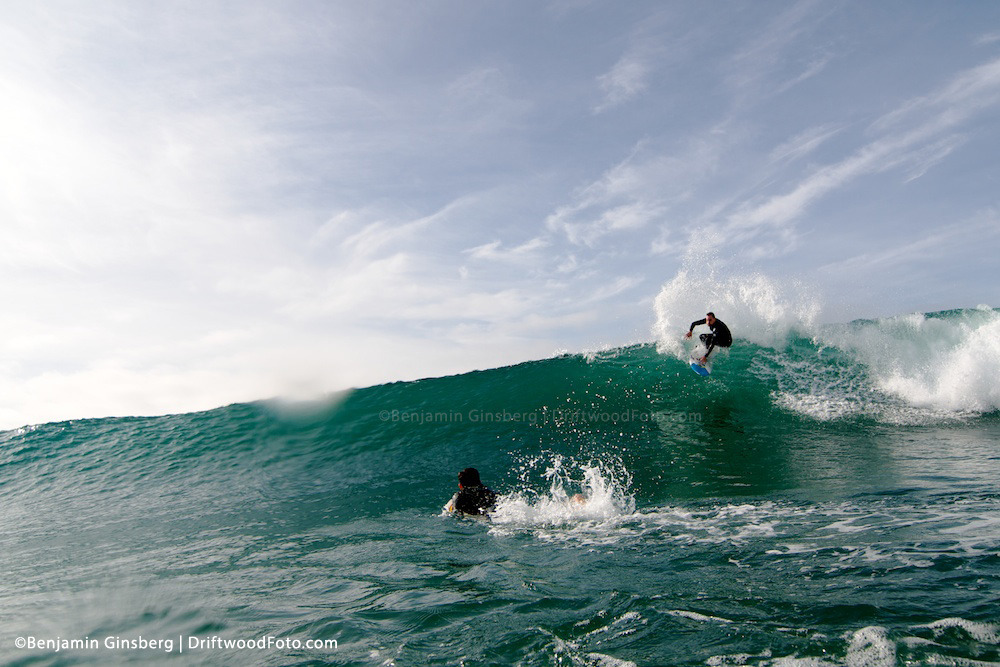
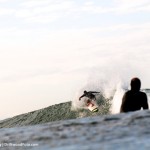
I had to dive through three set waves before capturing this shot of John John Florence- thankfully this easy dry-port technique allowed me to shoot clearly and capture all the action.
The actual solution is amazingly simple and low-tech.
- Salt water has a higher viscosity than fresh water, and even fresh water has a measureable viscosity.
- What does this mean? In practical application, if you’ve got your waterhousing submerged, all you have to do is rub (with a clean, sand/grit free hand!) up and down on the front of your lensport, and when you lift it above the surface, the water will drain vertically off the face of the lensport!
- Note this will not work if you rub the lensport left to right; rub in the direction you want the water to drain.
Thanks it! So simple! And if it’s so simple, why is it so hard to find this information? Why are some so unwilling to share this tidbit of knowledge? Who knows, but now you know too!
-
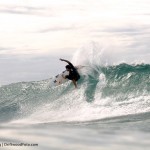
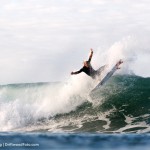
- Additional Tip: A longer lens and dry-port allow you to capture more extreme and even back-side angles to a wave/maneuver, such as this carve by Michel Bourez, while keeping your subject suitably prominent in the overall frame.
-
- Additional Tip: Just like on land, foreground elements add extra interest to water compositions.
-
- Additional Tip: Lenses with longer focal distances often have higher compression ratios, which add striking depth to an image, as shown in this air by Owen Wright.
-
- Additional Tip: A few drops can be good when they come from spray from the likes of Adriano De Souza.
If you found this useful, please let me know by commenting below, or sending me a direct message! Your feedback will help in creating future posts. Please keep visiting/reading for new photography techniques and tips, as well as amazing images and write-ups from Benjamin Ginsberg and Driftwood Photography Studios, and be sure to follow on Instagram/Twitter at @DriftwoodFoto.